
Sometimes when you’re feeling some amount of pain or discomfort in the upper body, your doctor orders an MRI to get a clearer picture of what is going on in your body.
In this post, we’re going to break down key information about MRIs for upper extremities, including the process of an MRI of the finger and that for a hand MRI procedure.
The Purpose and Procedure of an MRI
An MRI is also known as magnetic resonance imaging. An MRI is a noninvasive medical test that helps doctors identify, diagnose and treat medical conditions.
MRIs use a powerful magnetic field, radiofrequency pulses, and a computer to produce highly detailed images of organs, bones, soft tissues, and other body structures. The images can be pulled up on the computers and analyzed, or they can be printed or transmitted electronically.
Unlike X-rays, MRIs do not use ionizing radiation. MRIs are much more detailed than X-rays, and this allows physicians to evaluate the parts scanned with greater scrutiny and detail. The depth and detail of MRIs are greater than those of X-rays and CT scanning.
Why is an MRI performed?
There are several reasons for conducting an MRI, such as:
-
To diagnose or evaluate fractures in selected patients.
-
To diagnose spine disk abnormalities like a herniated disk.
-
To examine the integrity of the spinal cord after trauma has occurred.
-
To diagnose or evaluate degenerative joint disorders like arthritis and meniscus tears or labral tears in the shoulder or hip.
-
To diagnose and evaluate sports-related injuries or other work-related disorders that can occur because of repeated strain or a powerful blow.
-
To diagnose infections like osteomyelitis.
-
To diagnose and evaluate tumors that can occur in the bones and joints.
-
To diagnose and evaluate pain, bleeding, and swelling in the tissues in and around the joint sockets and other extremities.
The MRI of upper extremity joints includes four major joints of the body:
-
Wrist MRI
-
Finger MRI
How is an MRI of the finger done?
The MRI of the hand and fingers is more or less the same. The test can take up to 40 minutes and a minimum of 20 minutes. The lab technician may ask you to remove your clothes and wear a gown before the procedure.
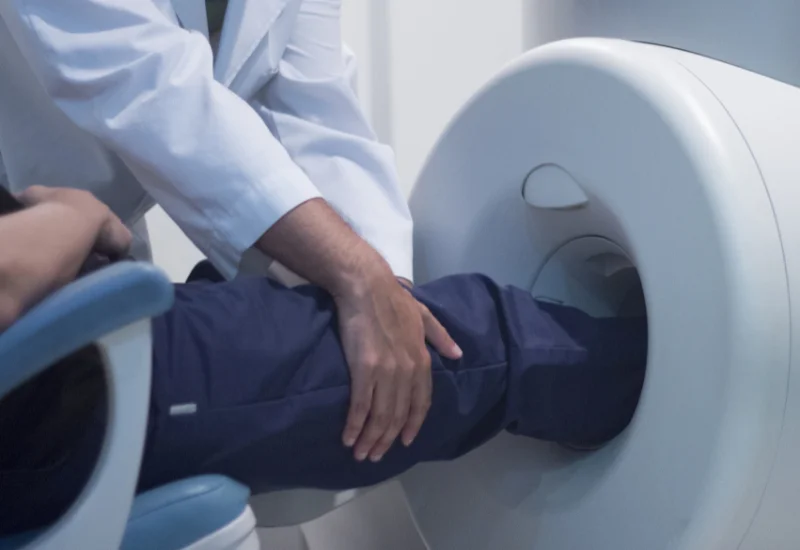
You will lie down on the MRI table and be moved into the center of a large tube-like scanner that is open on both ends.
The hand or finger under examination is then placed on the MRI coil. An MRI coil is a padded device that helps the machine capture good, high-quality images of the body part in focus. The coil is key to gathering excellent images. If it is physically possible for you, you will be asked to lie down on your abdomen as well, with the joint under focus extended in front of you.
In general, the wrist MRI procedure isn’t very different from a hand MRI procedure. During this procedure, you will have to lie down on the table head first and face down. The arm of the affected wrist is to be elevated over your head while the scan is taking place.
Therefore, the basics of an MRI on the wrist, finger MRI or MRI scan of the hand are mainly the same. This procedure will take around 45 minutes.
Additional information regarding MRIs:
-
While you will not feel anything during the procedure, the machine makes a significant amount of noise. You will hear a range of knocking, clicking, and humming sounds. You will be provided earplugs during the scan to help muffle the sounds.
-
Sometimes, the technician will use a contrast dye as per the radiologist’s instructions. The contrast agent will help gather additional information from the MRI. The technologist will inject the dye into a vein in the arm or hand, and the injection takes a few seconds to act.
-
Some patients will require results of a renal panel from the last 90 days for an MRI with an IV contrast. These patients include those who are 60 or older, have a history of renal disease, diabetes mellitus, or multiple myeloma.
-
The patient must remain still during the exam to ensure that the images obtained are of high quality.
-
The technician can see and hear you at all times during the exam. You will be given an emergency device, like a squeeze ball, which you can squeeze to get their attention at any point during the exam.
-
For MRI upper extremity joints, you do not need to prepare specially.
-
Ideally, you should wear clothes which are comfortable and made of cotton. There should be no zippers or metal rivets on them. You should also, preferably, leave jewelry at home.